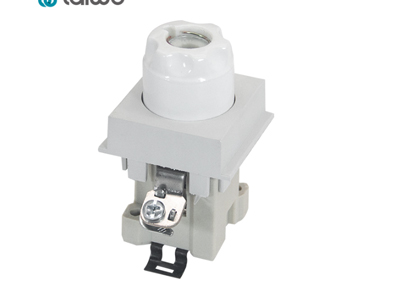
A relay fuse is a vital component in electrical systems, safeguarding circuits from excessive current flow. Knowing how to check it properly can help you identify and resolve electrical issues efficiently. Here's a step - by - step guide on how to check a relay fuse.
1. Safety First
Just like any electrical work, safety should be your utmost concern. Locate the main power source or disconnect switch relevant to the circuit where the relay fuse is installed. Use this disconnect switch to cut off the power supply completely. This is crucial as working on a live circuit can lead to electric shock, which can be extremely dangerous or even fatal. After turning off the power, use a voltage tester to confirm that there is no electrical current present in the circuit.
2. Locating the Relay Fuse
The next step is to find the relay fuse. It is usually located in an electrical panel, a fuse box, or near the device it protects. Different electrical systems may have different configurations, so it's essential to refer to the user manual or schematic diagram of the specific equipment if you're unsure. For example, in a car, the relay fuses are often grouped together in a fuse box under the dashboard or in the engine compartment.
3. Visual Inspection
Once you've located the relay fuse, start with a visual inspection. Examine the fuse for any signs of physical damage. Look for a blown fuse, which might show a melted or broken wire element inside the clear glass or plastic casing. Also, check for any signs of overheating, such as a discolored or charred fuse body. If you notice any of these symptoms, it's a clear indication that the fuse has malfunctioned and needs to be replaced.
4. Using a Multimeter
If the visual inspection doesn't reveal any obvious issues, you can use a multimeter to conduct a more accurate test. Set the multimeter to the resistance (ohms) setting. Touch the two probes of the multimeter to the two terminals of the relay fuse. If the fuse is in good condition, the multimeter should show a very low resistance reading, close to zero ohms. This indicates that the electrical path through the fuse is continuous. However, if the reading shows infinity or a very high resistance value, it means the fuse has blown and is no longer conducting electricity.
5. Testing the Relay Function (Optional but Recommended)
In some cases, it's also beneficial to test the relay function. Some relays have a coil and contacts. To test the coil, you can use the multimeter to measure its resistance. A faulty coil will usually show an abnormal resistance value compared to the manufacturer's specifications. To test the contacts, you can apply power to the relay (while ensuring safety) and check if the contacts open and close as they should. You can do this by listening for an audible click when the relay is energized and also by using a continuity tester to check the electrical connection across the contacts.
In conclusion, checking a relay fuse is a relatively simple yet important task. By following these steps, you can quickly determine whether the relay fuse is in working order or needs replacement. If at any point during the process you feel unsure or if the electrical system is complex, it's advisable to seek the assistance of a professional electrician.

INQUIRY NOW